Be the first to get a taste of our a next big idea in healthy, green fun!
           
About     Blog     Contact     FAQ     Press     Shop

Archive for the ‘Decor’ Category

How to Celebrate a “3R” Halloween: Reduce, Reuse, Recycle

Wednesday, September 7th, 2011

We all know the 3R’s – Reduce, Reuse & Recycle.

But applying them to Halloween? Might not seem so obvious.

We’ll make it easy -

Here are three simple ways to put the 3R’s into your holiday.

Reduce – Instead of handing out handfuls of candy to each little ghost and goblin, consider giving just one of something.

You’ll save money and your decision will likely be better for the health the children who come to your door (since they’ll consume less) and for the planet since fewer resources will go into the making, packaging, transporting and/or disposal of the treat. Reducing can be applied to all of your holiday choices. And if you have reason to be concerned that your guests, kids, neighbors or husband will get scary on you when you announce your new plan to cut back on behalf of kids and the planet?

Try reducing by just 25%. Chances are, no one will notice but you and your Mother Earth.

Reuse – Halloween could be the poster child for reusing.

Nearly every aspect of the holiday can be celebrated in style without buying a single thing new. So don’t rush out to buy costumes, décor and party games.

Instead, stop and think. What can be reused or repurposed to make this holiday a smash hit without costing the planet?

Rent, borrow, swap or construct costumes from existing materials (making Halloween costumes from scratch can increase the fun factor, too), and keep your lawn ghouls and orange LED lights year after year. You might get tired of seeing them, but guaranteed, you’re building a tradition – one the kids in your home and neighborhood will remember.

You wouldn’t want to mess with good memory making, now, would you?

Recycle – The best way to utilize the third and final R is to first, choose items that are made from recycled content instead of buying products made from raw or virgin materials. When the product you’ve bought or acquired can no longer be used, it should be recycled.

Recycling can happen in many ways such as through your waste management company, your compost pile (yes, most food can be recycled) or through your own creativity. Breathe new life into your husband’s old flannel shirt and jeans, for example, by recycling them into a scarecrow for your front porch or a costume for your ten-year-old.

And no matter what, always, always, compost made-by-nature Halloween décor such as wilting pumpkins and gourds instead of throwing them in the trash. Uneaten Halloween candy can also be “recycled” just be sure to remove the wrappers first.

p.s. We think “Reduce, Reuse & Recycle” would make a great group costume for three siblings or friends! What are your ideas for think-out-side the box, green-themed costumes?

Green Halloween® is a nationwide non-profit initiative started by mother-daughter team Corey Colwell-Lipson and Lynn Colwell. In 2010, Green Halloween became a program of EcoMom® Alliance and has events in cities across the U.S.

We all Scream for Green Halloween (NYC)

Friday, January 28th, 2011

2010′s Green Halloween in NYC was a screamin’ success!

Screamin’ Green Halloween” was hosted by Brookfield Office Properties at the World Financial Center in the Big Apple.

Eek-o-fabulous fun was had by all (6,000 guests in just 4 hours!) with recycled art, a costume swap, poetry reading, marching band, healthy/green goodies and more.

Here are a few of the fab photos (by photographer Andrew Federman) for more, click here.

And check out this HUGE promotion banner hanging for all to see!

Date: Saturday, October 30, 2010

Time: 12 p.m.-4 p.m.

City & state: New York, NY

Event description: Green your Halloween at the World Financial Center! Join artist-educators for mask and costume making with funky recycled and repurposed materials, compete with other witches and warlocks in “Put a Spider in the Brew”, “Bowling for Ghosts” and a twist on the traditional “Bobbing for Apples,” and enjoy organic and fair-trade candy treats. Exchange last year’s costume for a new one at the Costume Swap, each gently used and ready-to-wear. Mini parades led by the Hungry March Band will take place on the Plaza at 1, 2 and 3pm, and the day ends with a Ghosts & Goblins Parade to Poets House for a reading of spooky poems and seasonal snacks. Ride your bike to the event! Free valet bicycle parking provided by Transportation Alternatives.

Presented by: Brookfield Office Properties

Event Production: Q+A Events and Production

Exact location: World Financial Center, 220 Vesey Street, New York, NY 10281

Cost (if any): FREE

Event URL: www.artsworldfinancialcenter.com

Annual event?: YES

Green Halloween® is a nationwide non-profit initiative started by mother-daughter team Corey Colwell-Lipson and Lynn Colwell. In 2010, Green Halloween became a program of EcoMom® Alliance and has events in cities across the U.S.

Last minute Halloween Craft: Spider Web!

Friday, October 29th, 2010

Guest Post by Vanessa Valencia. Her blog is located at www.aFancifulTwist.Com and her website is located at Www.VanessaValencia.Com.

I think we should do something extra delightful today, don’t you?  I have so much fun cutting paper, and figuring out my own easier (to me) ways of doing things, that I decided to share.

So, I have 2 paper spider web techniques for you today…


I have been working on this post for a couple of days, and I hope you enjoy making these as much as I do….

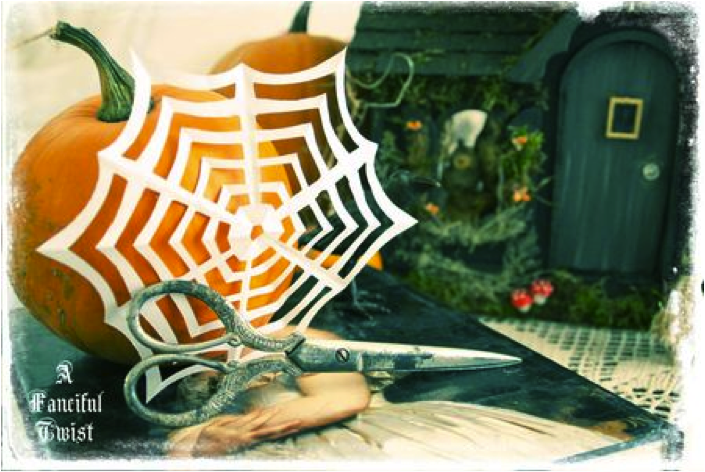
To start, all you need is regular white printer paper, and scissors.

You can get fancy with spray paint and glitter a little later.  But for now, grab a piece of printer paper, and some scissors.

I like printer paper because it makes it easy to cut through the layers.  And, a coat of spray paint makes them a bit sturdy.

(I have moss and green metallic paint on my thumb in the spirit of swamp creatures, just for this spooky post)

I am going to share 2 techniques.

A simple and easy spider web technique…

And, a trickier way to use the “snowflake-paper-flower-urchin” method I showed you last year (see here), by spookifying it a bit.

Let’s begin with a simple paper spider web.

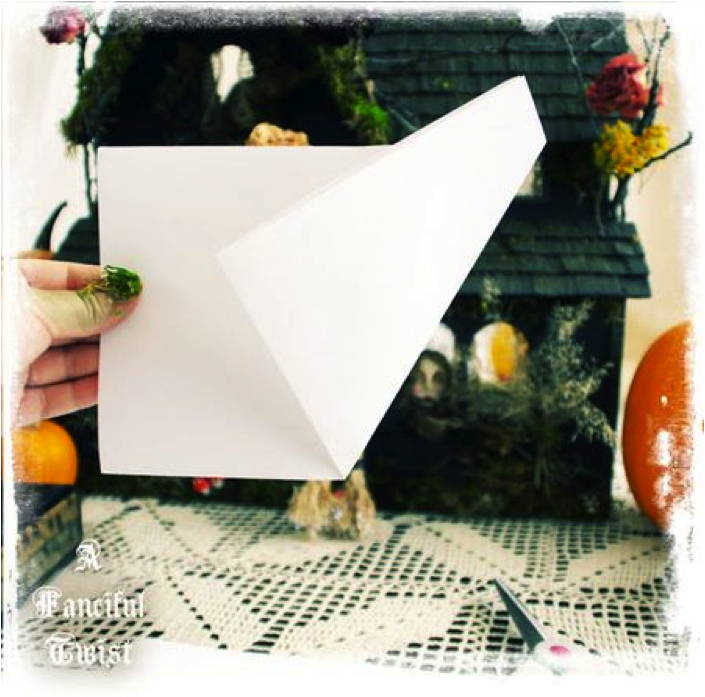
First, take a sheet of printer paper, and fold it in half, with the open side facing up.

Once you have folded it in half, fold it in half again, but only crease it at the bottom.

Next, fold the bottom right hand side up, so that you create a “V” point at your center mark.

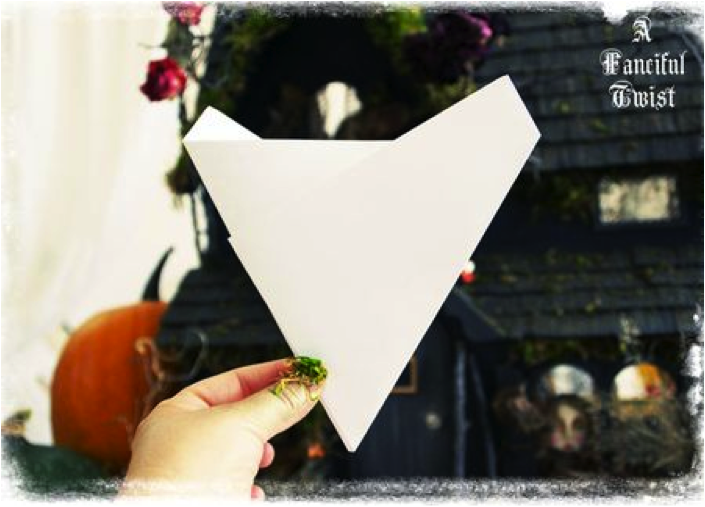
Now, take your left side of paper, and fold it towards the back, lining up the edges.

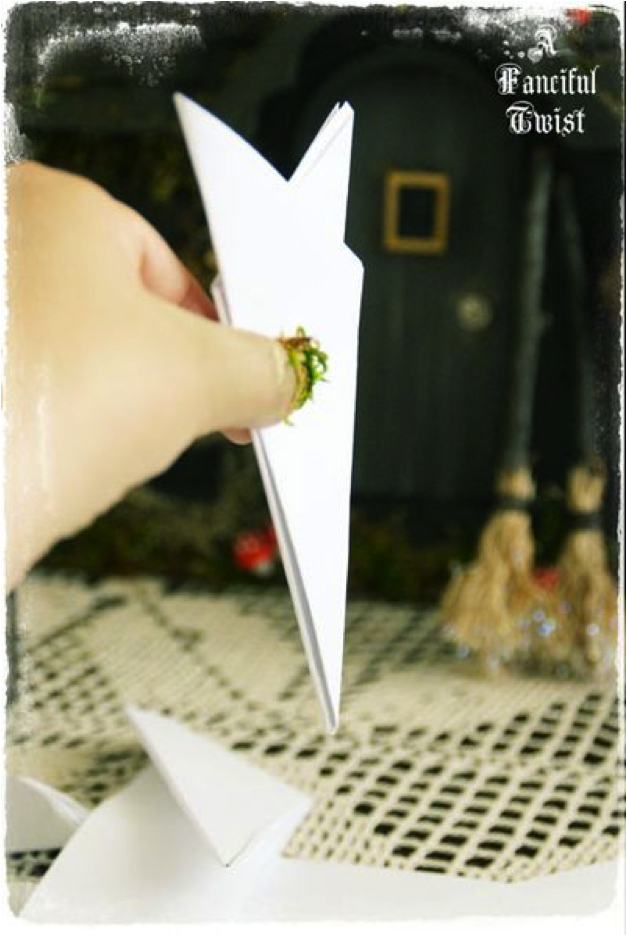
Your paper should now make a “V” shape with a funny top.

We want to cut off the funny top.

So, make a horizontal line across your paper about here…

Now, cut the funny top of the paper off, to create a true “V”…

And now, you have a true “V” shape.

The next thing we will do is fold our ”V” in half.

Doing this will create a folded side, and an open side…

Face the open side to the right, and the closed/folded side to the left.

Next, we shall begin defining where we will make our cuts.

Take a pen or pencil and draw a line that starts in the upper right hand corner, and swoops down to the left.

This is the cut that will create the outer spider web shape.

Cut that piece off…

The next thing you will do is draw 4 long rectangles from the right side, to the left.  However, you must not cut into the left folded side, as it holds everything together.  So, make sure your rectangle ends a little before the left hand fold.

See below…

Now, you will cut out your rectangles.

Again, make sure you do not cut through the left hand side.

Tip:  The thickness of your cut rectangles determines how delicate your final spider web shall be.  Remember, thicker cuts equal less paper, and therefore more delicate spider webs.  You’ll see.

Let’s keep going…

So, after you have cut out all four rectangles. Make a tiny snip at the bottom.

The final bottom snip creates the center of your spider web.  The larger the snip, the larger the center opening of your finished spider web.

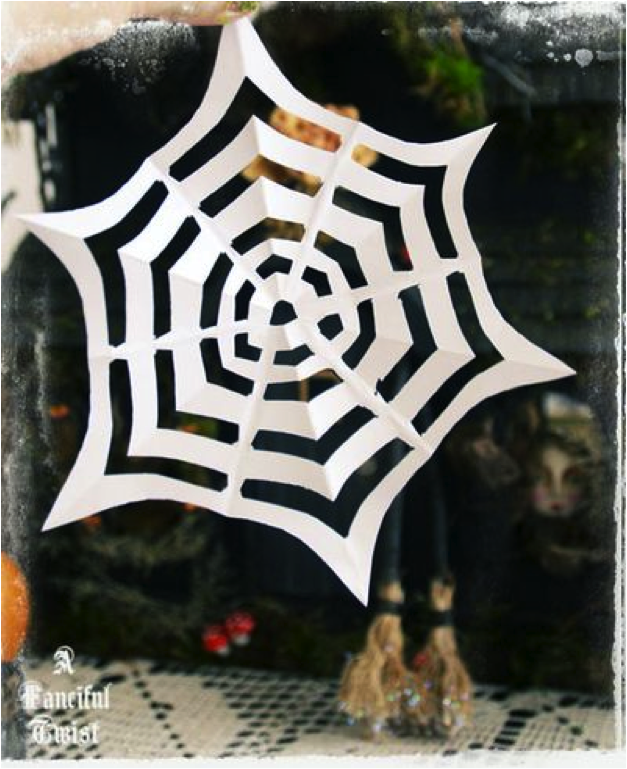
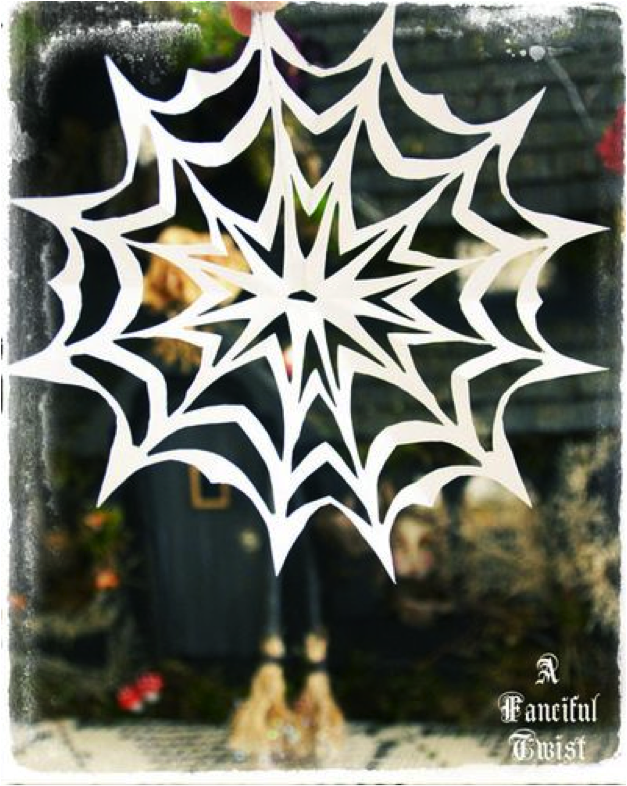
Next, open up your spider web…

It’s okay if it isn’t perfect because the paint and glitter will fix it all :)

YAY!  A spider web.  Woo hoo!  Are you dancing in your chair?

You better be, or elssssssse…

Oops, that’s my witchie self peeking out there ;)

You can use any paper you’d like.  I used printer paper for ease of cutting, but feel free to try this with any paper.  Scrapbook paper works beautifully too.  Especially a dark-distressed vintagey scrapbook paper.

Before we try painting these, let’s try the trickier cutting technique, okay?

The trickier cutting technique creates all sorts of wild paper-cuts.

Here’s an example.

See what I mean?

Below we will try the “spookified snowflake” technique.

Again, I am using a piece of white printer paper.

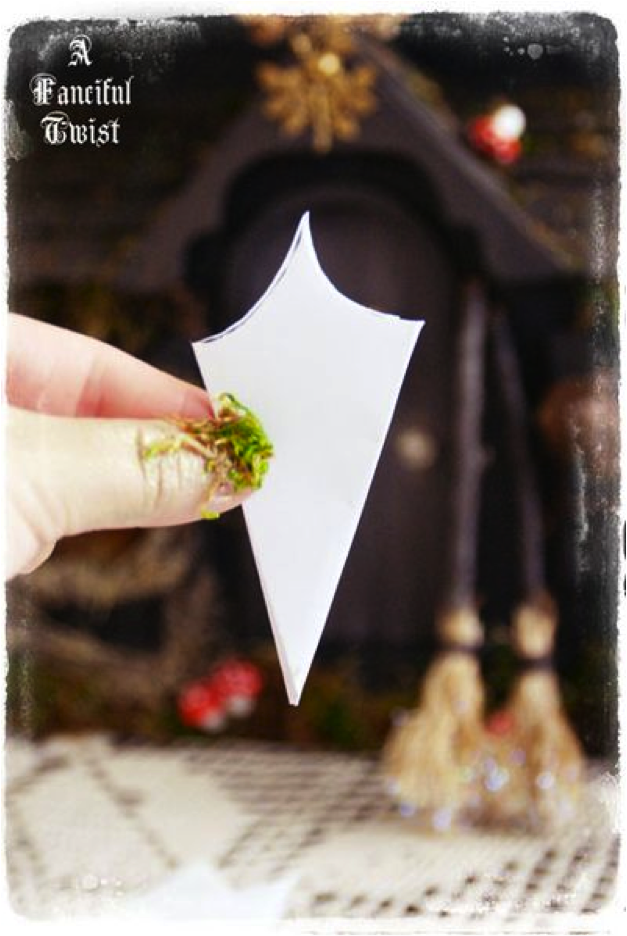
To begin, fold the right bottom corner upwards to create a triangle…

Now, cut off the long rectangular strip at the top, to form a true triangle.

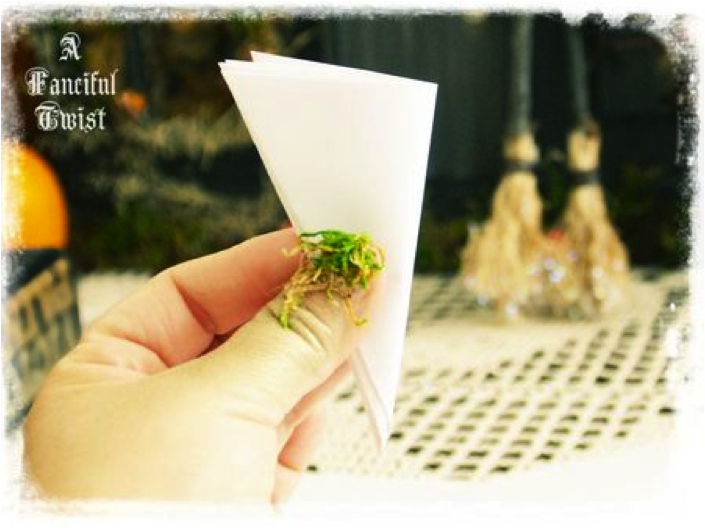
Then, take your triangle, and fold it in half again.  To form a smaller triangle.

Holding your smaller triangle upside down, fold the right side into the center.

Then, fold the left side to the back, so that all edges line up…

Coming together, to form a ”V” shape.

Your folded paper should look like this.

The next step is to cut off the paper tops, and create a true “V” shape.

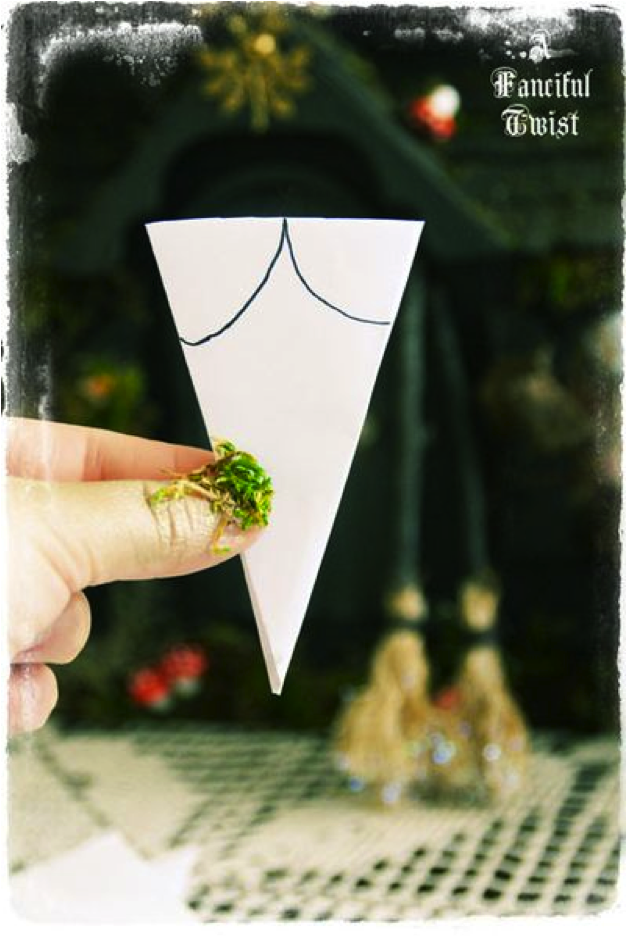
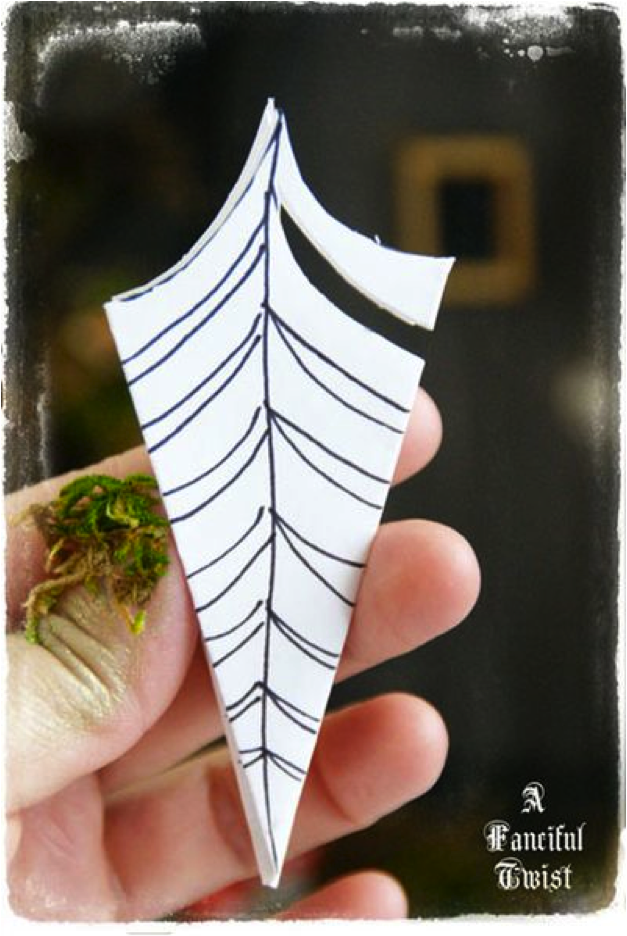
The first thing we must do is draw our cutting guide lines.

First draw a line with a peek, like I have done below…

Then, go ahead and make your first cut.

The next thing we will do is draw a line in the center, with down swooping lines on either side.

The most important thing to remember with this type of snowflake/spider web is that your center line marks your cutting stop point.

You must not cut through your center line.

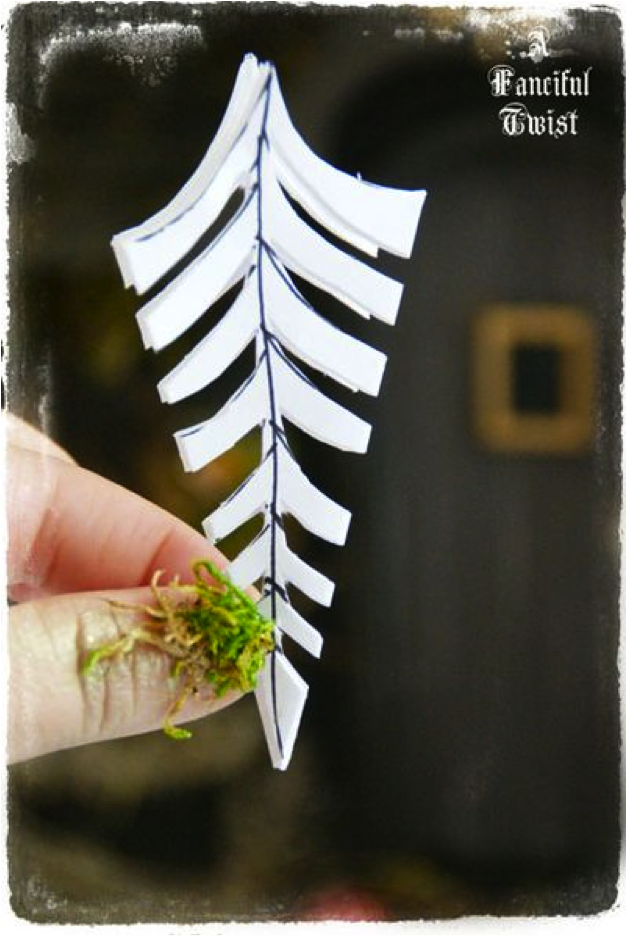
Below is an example of how I cut up to the center line, but not through it.

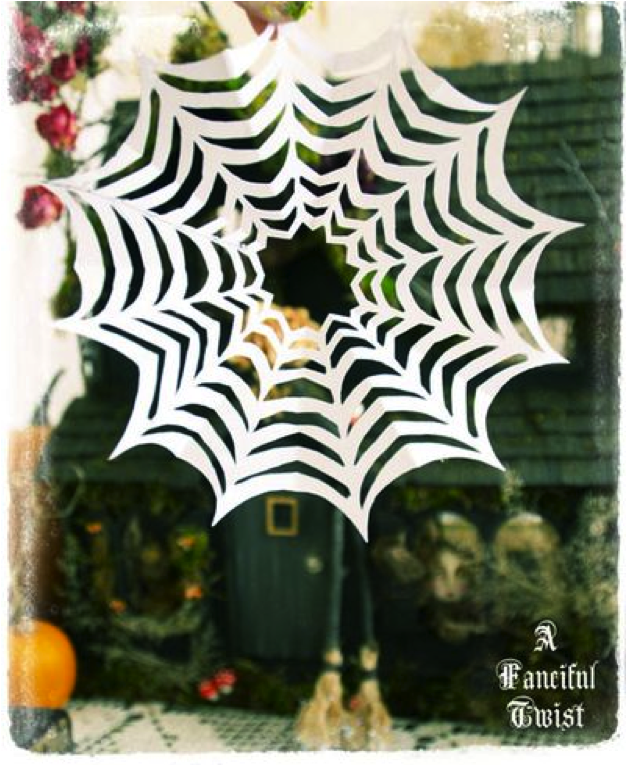
Make a snip at the bottom, to create your center opening.  Then, open up your cutting, to see what you made.

That’s the funnest part ;)

Try another one…

Invent your own cuts, but follow the rule of not cutting through the center.

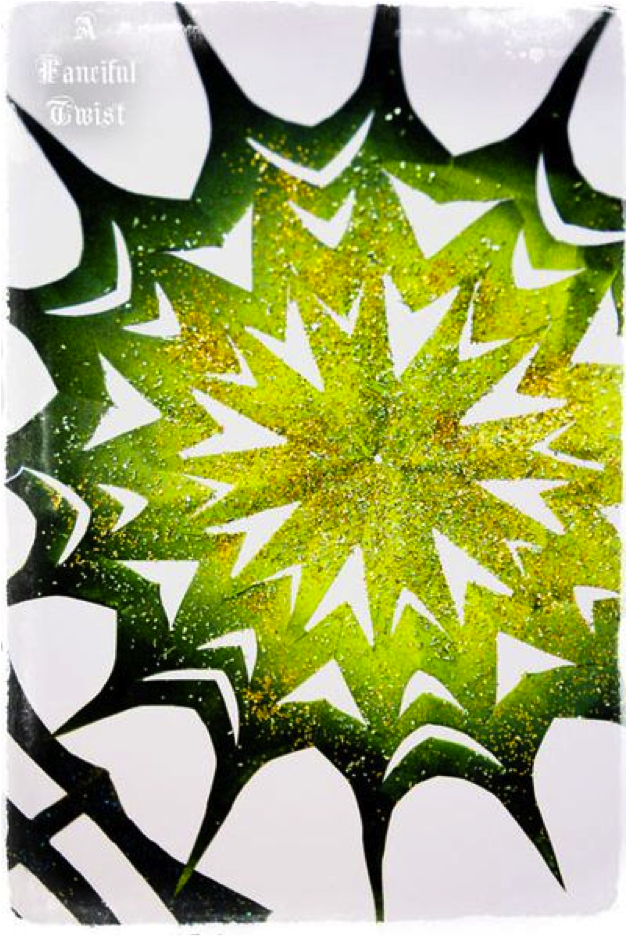
Oooo, spooky star-web….

Okay, I am ready to paint and glitter!

I tested two kinds of spray paints.  A matte Master craft spray paint, and an everyday multi-use gold spray paint that we had in the workshop.  They both work great.

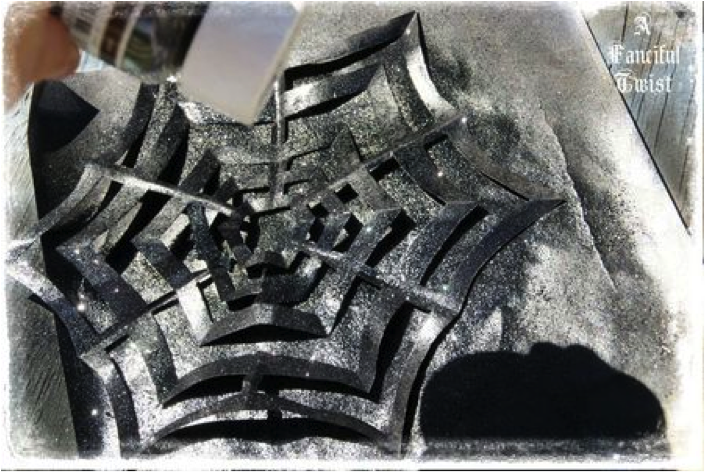
Make sure you do the spray painting outside, in a super well ventilated area.

I took a few glitter choices outside with me, because I simply sprinkle my glitter on the wet paint…

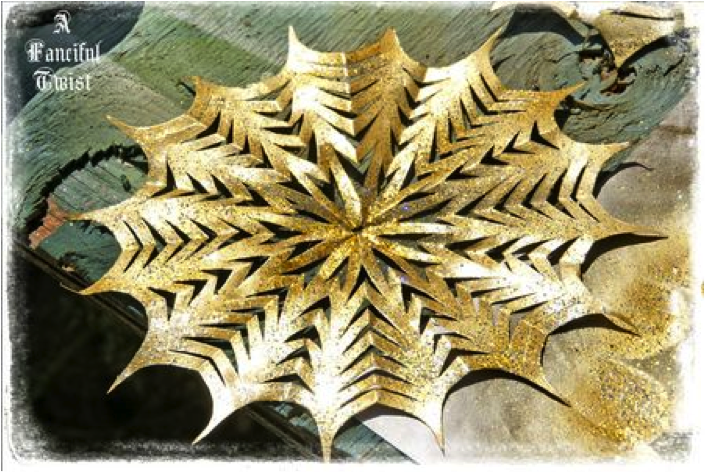
I tried a gold spray paint first.  I was super pleased.  Then I sprinkled a funky gold-multi fairy sparkle on it…

I then painted a few traditional black spider webs, and sprinkled some black fairy dust on them while the paint was still wet.
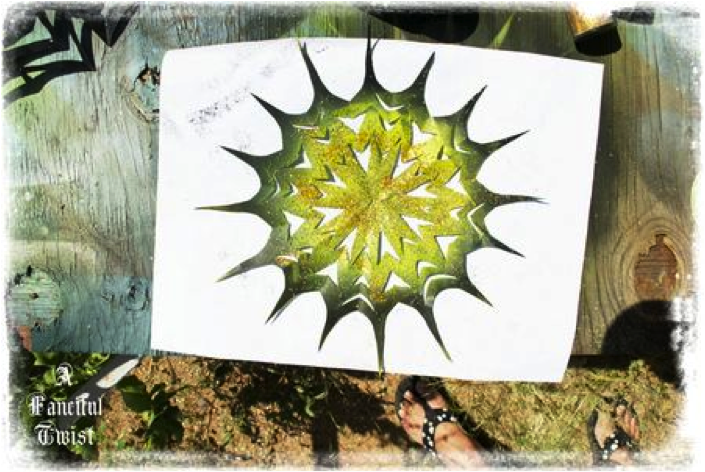
Then I stepped outside of the proverbial box…

I painted one of my star-snowflake-webs in black, and then sprayed some olive green in the center.  I sprinkled gold glitter on the green, and I really liked it.

Now I have a whole collection of spookylicious hanging treats.

And all virtually free, and fun to make.

How can you go wrong?

I am going to try the same spray paint technique with snowflakes during the holidays.

I am hooked.

(The photos don’t show how sparkly these are in person)

Off I go to make more…..

Have a super magical Halloween!!

Green Halloween® is a nationwide non-profit initiative started by mother-daughter team Corey Colwell-Lipson and Lynn Colwell. In 2010, Green Halloween became a program of EcoMom® Alliance and has events in cities across the U.S.

Halloween Crafts: Decorative Mantle for your home.

Wednesday, October 20th, 2010

We are blown away at this beautiful DIY Halloween mantle created by the talented Regina of Creative Kismet. She made it by taking random objects in her storage which goes right along with our philosophy of recycling and re-using to celebrate a greener Halloween! Many kudos to Regina for following this philosophy while creating such a lovely piece of decor for her home and hearth.

It’s not too late to look around what you’ve been storing up in the attic or the garage to see if there are treasures there to make your very own Halloween mantle piece. You may never know what long forgotten objects are awaiting to be used by your creativity!

Green Halloween® is a nationwide non-profit initiative started by mother-daughter team Corey Colwell-Lipson and Lynn Colwell. In 2010, Green Halloween became a program of EcoMom® Alliance and has events in cities across the U.S.

Halloween Crafts: Spooky Shadow Puppets!

Monday, October 18th, 2010

I came across this wonderful how-to while reading The Storque, Etsy’s handmade blog and thought to myself.. that’s a perfect craft to do for Halloween! Who wouldn’t want to play with these awesomely spooktacular puppets during a Halloween party? Turn all the lights off and have a fun and frightful time as partygoers wave these puppets around.

The idea was conjured up by the talented crankbunny (her etsy shop) and the instructions on how to create your very own shadow puppets are located here. There are two templates you can download and use, but you can also come up with your very own designs! Just follow the instructions and you’ll have an army of these badboys in no time!

We’ve also embedded the video how-to as well for your viewing pleasure!

Green Halloween® is a nationwide non-profit initiative started by mother-daughter team Corey Colwell-Lipson and Lynn Colwell. In 2010, Green Halloween became a program of EcoMom® Alliance and has events in cities across the U.S.